EIN notice, November 2024: The new Practice Direction makes significant changes for First-tier Tribunal bundles. See our new guide on bundle changes on EIN as a result of the November 2024 First-tier Tribunal Practice Direction.
Bundles enable you to store selected content from the EIN website and then quickly turn that content into fully paginated and indexed Microsoft Word documents. You can also add your own materials, such as Word documents and PDF files, to a bundle.
It's a huge time saver and this simple to follow guide will take you through the basic steps needed to create bundles (more advanced functions are covered in separate help pages). You will need to download and install the Word Bundle-Maker add-in available here before working through this guide (the add-in is only accessible to EIN members - you will need to sign up and join EIN if you are not a member).
The basic process is this: create a content bundle on EIN; add cases/reports to your bundle; export your bundle to Microsoft Word; run the Bundle-Maker to format it as a paginated and indexed bundle.
Overview
The 'Content Bundles' block appears on the right-hand side of a page on EIN. It appears whenever you are viewing case law, country reports, legislation or resources. You can expand and contract it by clicking on the blue header.
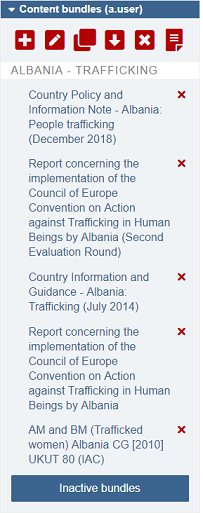
At the top of this block is the toolbar. A full list of the toolbar commands is below:
ADD NEW BUNDLE - click to create a new bundle
EDIT ACTIVE BUNDLE - click to go to the page where you can edit and rearrange the items in your current bundle
CLONE ACTIVE BUNDLE - click to create a copy of your current bundle
EXPORT ACTIVE BUNDLE - click to export your current bundle into a single document or web page
DELETE ACTIVE BUNDLE - click this to delete your current bundle
EXCERPT MODE - this switches excerpt mode on and off (when 'on', you can select and add excerpts to a content bundle)
Step 1: Create a content bundle
The first thing you need to do is create a content bundle so you can add content to it. To do this, simply click the ADD NEW BUNDLE toolbar button:
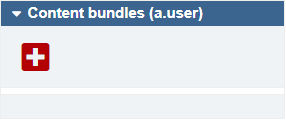
This opens the 'Add New Bundle' pop-up dialog.
Enter a title for your bundle and click the 'Save' button:
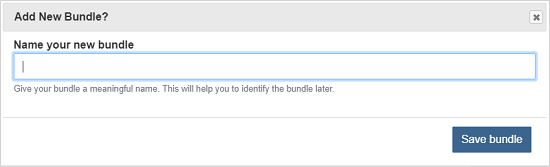
You can create multiple content bundles (as many as you need) and they remain saved on the EIN server. So your bundles are always available and can be accessed whenever and wherever you log on to EIN.
[Note: you can easily switch between bundles and the guide available here covers this topic]
Step 2: Add items to a content bundle
Now you have a content bundle created, you need to add items to it.
The 'BUNDLE ' link appears on the left of a page when you are viewing case law, country reports, legislation and resources.
Click it to expand and reveal the commands to add to a bundle.
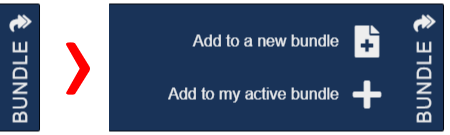
Click the link to 'Add to my active bundle'.
When you click the link, the item will appear in your 'Content Bundles' block (and note that this item is a link to the original item so content bundles allow you to very quickly and easily revisit items that you have chosen):

Note that 'Add to my active bundle' changes to 'Remove from my active bundle' so you can easily remove items from a bundle (you can also click the icon next to the item in the Content Bundles block to remove an item).

You simply repeat adding items until all of the required items are in your content bundle. When you have finished adding items, you can then export your bundle.
[Note: once you have mastered this beginner's guide, you can see the guide available here which explains how you can select and add excerpts of an item to a bundle rather than the whole item]
Step 3: Export your content bundle
Exporting your content bundle turns it from a collection of links into a single document containing the entire content of all of the items in your bundle. To export your content bundle, you simply click the EXPORT ACTIVE BUNDLE toolbar button:
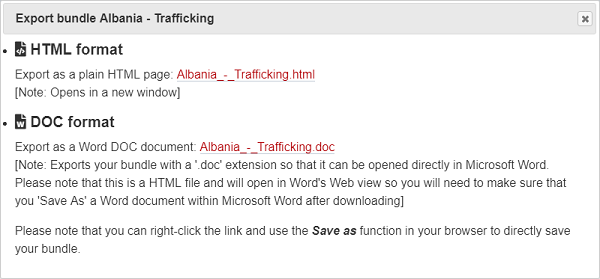
The bundle export pop-up dialog will appear and you can choose the format you wish to export to. You can export your bundle as a simple HTML web page (which you can copy and paste to Word) or you can export your bundle directly to a Microsoft Word DOC fomat document (which can be opened directly by Microsoft Word).
From 01 November 2024, there are additional links to export your bundle as a 'Country Information Evidence Schedule for First-tier Tribunal (IAC)' to comply with the new Practice Direction. This puts all your bundle items under a main 'Country Information Evidence Schedule' heading. You'll need to ensure that your bundle complies with the Direction's requirements for length or else that you have permission to rely on a longer Country Information Evidence Schedule.
We recommend exporting to DOC format - this will ensure perfectly formatted results, no matter which web browser you are using, and it will avoid any performance issues you may encounter trying to copy and paste a large web page.
Exporting to DOC Format
The export to DOC function will export your bundle to a document with a '.doc' extension. Depending on your browser settings, you will be prompted to open or save the document. You can open the bundle document in Microsoft Word when it's finished downloading:

Please note that this is actually a HTML page, but Microsoft Word will open it as if it were a Word document. After opening, save the exported bundle as an actual .doc/.docx Word document: simply select 'Save As' in your Word 'File' menu and save your bundle as a standard Word document. Word will save your bundle with all formatting preserved.
You can now skip to Step 4 of this guide.
Exporting to HTML Format
If you choose to export your bundle to HTML format, a new window will open with a page containing the full text of all of your bundle items. You can simply select and copy the exported content bundle webpage and then paste to a new Word document.[Note: always make sure the exported content bundle webpage is fully loaded before copying - a large bundle may take a few seconds to finish loading]
You can copy a webpage using then 'Edit' menu to first 'Select All' and then 'Copy', or you can do Ctrl+A to select and then Ctrl+C keys to copy, or you can use the menu that is displayed by right-clicking your mouse.
Step 4: Edit your bundle in Microsoft Word
Having exported your bundle directly to Word or having copied and pasted your exported content bundle webpage, you can now edit your bundle as any standard Microsoft Word document:

As you are working in Microsoft Word, you have full flexibility to add your own content at this stage.
You can add your own:
• Text and Word documents
• PDF files
• and you can even easily incorporate printed/hard-copy only documents.
You can also highlight key passages within your bundle to create your required schedule of essential reading.
If needed, you can easily rearrange the order of the items in your bundle too.
The guides available here cover all of the above options - we recommend practising these steps once you have mastered this guide.
Step 5: Run the Bundle-Maker
When your bundle is ready to create, click 'Bundle-Maker' on your Microsoft Word ribbon/menu bar and click 'Create/Undo Bundle...':

When the 'Bundle-Maker' is displayed, you'll see that there are various formatting and editing options available under the relevant tabs. See the guide here for more details. The default options should be fine for most users so you can simply enter an appeallant name and appeal number, if required, and click the 'Create Bundle' button:

The Bundle-Maker automatically creates your bundle in seconds - giving you a fully paginated and indexed bundle!

Note that if you choose to add PDF files to a bundle, you'll need to run the PDF Bundle-Complier as a final step at this stage. The guide here explains all about adding PDF files and and compiling a PDF bundle.
You should also note that you can undo the bundle formatting, easily allowing you to edit bundles or correct mistakes, and then simply recreate a bundle.